
Online Train Ticket Booking Learn how to create an ID for online train ticket booking. Step-by-step guide to register, verify, and start booking train tickets easily from home. Booking train tickets online has become the most convenient way to plan travel in India. Whether you’re traveling for work, college, or a family trip, having your own railway booking ID makes the process quick, easy, and stress-free. But if you’re new to online ticket booking, the first question is usually: How do I create an ID for online train booking?
In this detailed guide, we’ll walk through everything — from creating an account to booking your first ticket and even understanding Tatkal booking. By the end, you’ll be ready to book tickets from the comfort of your phone or laptop without ever standing in long queues.
Why You Need an ID for Online Train Booking
An online booking ID is your personal account that connects you with the Indian Railways ticketing system. Without it, you cannot log in, search trains, or book tickets online. Having your own ID allows you to:
- Book tickets from anywhere, anytime.
- Check train schedules, seat availability, and fares.
- Manage bookings, cancellations, and refunds.
- Use Tatkal and premium services.
Popular Platforms for Booking Train Tickets
- There are several ways to book train tickets online, but the most trusted and widely used platforms are:
- IRCTC Official Website (www.irctc.co.in)
- The official platform by Indian Railways. It’s free, secure, and easy to use.
- Rail One App
- A newer, user-friendly mobile app that allows ticket booking, Tatkal reservations, live status tracking, and more.
- Other Trusted Apps
- Apps like MakeMyTrip, ConfirmTkt, and RailYatri also use IRCTC’s booking system and can be used after creating your ID.
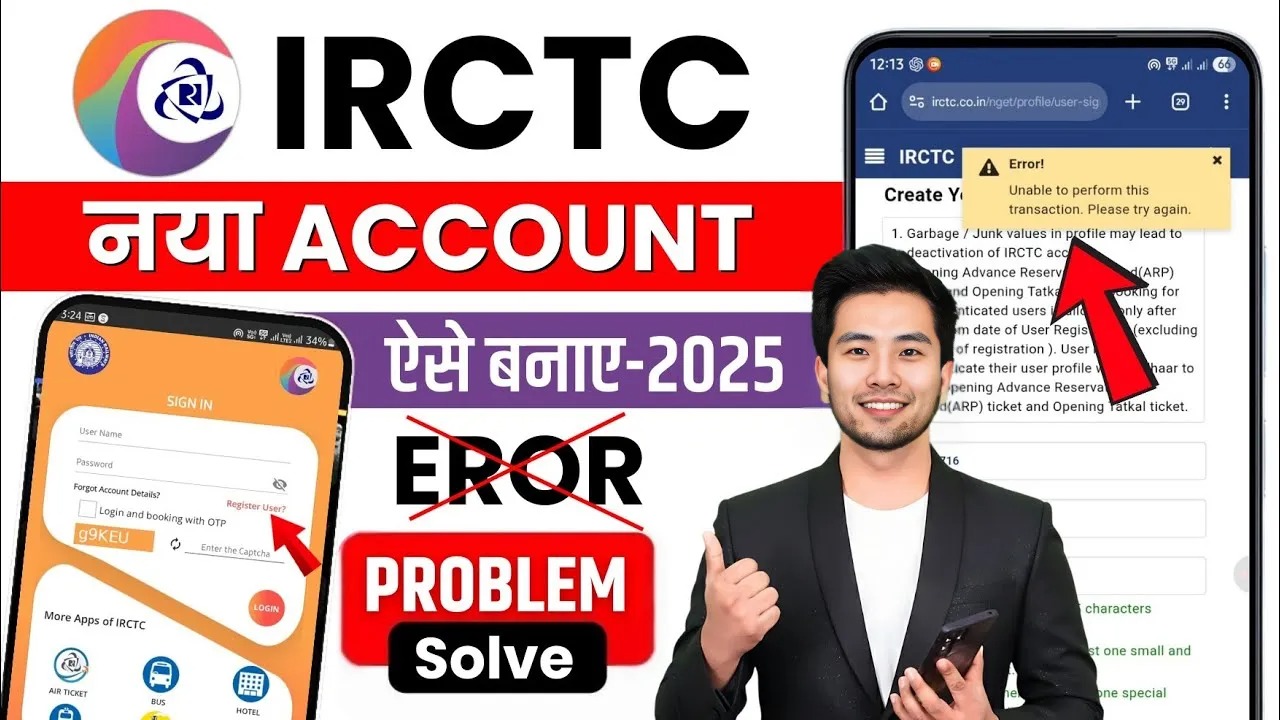
Step-by-Step Guide: How to Create an ID on IRCTC
Creating an account is simple and takes just a few minutes. Here’s how:
Also Read


- Step 1: Visit the IRCTC Website or Download the App
- Go to www.irctc.co.in or download the IRCTC Rail Connect app from Play Store or App Store.
- Step 2: Click on “Register” or “Sign Up”
- On the homepage, click on ‘Register’ to create a new user ID.
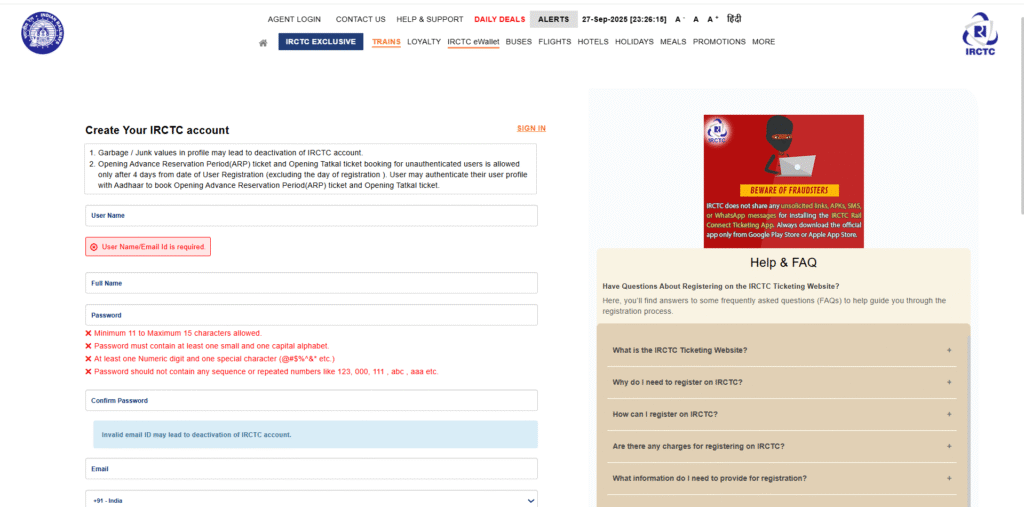
- Step 3: Enter Your Personal Details
- Fill in details like your name, date of birth, gender, and address.
- Step 4: Create a Username and Password
- Choose a unique username and a strong password (use letters, numbers, and symbols).
- Step 5: Verify Your Mobile Number and Email
- You’ll receive an OTP on both email and mobile. Enter them to complete verification.
- Congratulations! Your account is now created and ready to use.
Tips for Choosing a Strong Username and Password
- Use at least 8 characters.
- Combine uppercase, lowercase, numbers, and symbols.
- Avoid using personal details like your name or birth year.
How to Log in to Your New Account
- Once registered:
- Go to the IRCTC website or open the app.
- Click on Login.
- Enter your username and password.
- Enter the CAPTCHA code and click Sign In.
How to Book Train Tickets Online (Step-by-Step)
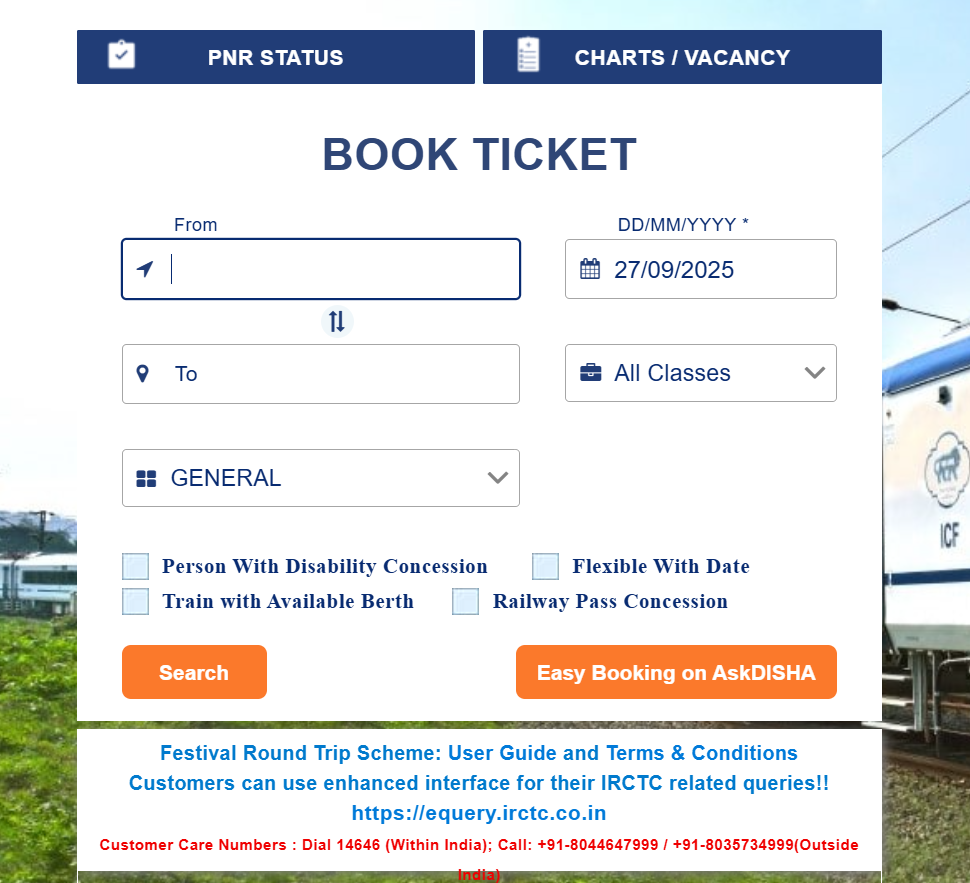
Booking tickets is easy once your ID is ready:
- Login to your account.
- Search Trains: Enter the source and destination, travel date, and class.
- Select Train: Choose a train that suits your timing and class preference.
- Enter Passenger Details: Name, age, gender, berth preference, etc.
- Payment: Pay via UPI, debit/credit card, or net banking.
- Ticket Confirmation: Once payment is successful, your e-ticket is emailed or sent by SMS.
How to Book Tatkal Tickets Using Your ID
- Tatkal tickets are limited and get booked within minutes. Here’s how to do it:
- Booking Time:
- AC Classes: 10:00 AM (one day before travel)
- Sleeper Classes: 11:00 AM (one day before travel)
- Steps:
- Log in before Tatkal booking starts.
- Search your train and select the Tatkal quota.
- Fill passenger details quickly (save them beforehand).
- Pay instantly using UPI for faster confirmation.
Pro Tip: Use a strong internet connection and keep all details ready before 10 AM.
Also Read:- Work From Home for Students: How to Earn ₹25,000 Per Month From Mobile (5 Easy Ways)
How to Check PNR Status and Live Train Status
- Once booked, you can check your ticket status anytime:
- Go to the “PNR Status” section.
- Enter your 10-digit PNR number.
- You’ll see the latest confirmation status and seat details.
- You can also track live train running status directly from the app.
Managing Cancellations and Refunds
- Go to “My Bookings” in your account.
- Choose the ticket you want to cancel.
- Follow the steps and confirm.
- Refunds are processed automatically within 3–7 business days.
How to Update or Recover Your ID Details
- Forgot your password? No problem.
- Click “Forgot Password” on the login page.
- Enter your registered email or mobile.
- Reset your password using the OTP.
- Safety Tips for Online Ticket Booking
- Only use trusted platforms like IRCTC or Rail One.
- Avoid sharing OTPs or passwords with anyone.
- Double-check passenger details before making payment.
Advantages of Booking Train Tickets Online
- Book tickets 24/7 from anywhere.
- Save time and skip long queues.
- Access Tatkal and Premium services.
- Track train status in real time.
Common Mistakes to Avoid When Creating Your ID
- Entering incorrect details (can cause ticket issues).
- Using weak passwords.
- Not verifying your email or mobile number.
Conclusion
Online Train Ticket Booking creating booking ID is the first step to hassle-free train travel. Once your account is ready, you can book tickets, check PNR status, track trains, and even secure Tatkal seats — all from your phone or laptop. Follow the steps carefully, stay alert during Tatkal hours, and you’ll never have to stand in a ticket queue again.
Join Our Group

My name is Anaya Afrin, the founder of Seekho Smart. I built this platform to make knowledge simple, clear, and truly useful for students and readers everywhere. With over 6 years of blogging experience, I’ve learned how to turn complex topics into easy guides that inspire learning. Through my writing, I aim to share practical knowledge that not only informs but also empowers people to grow and achieve their goals.